Not Enough Memory Error in Windows 10
Whenever you open a File, Program or Web browser on your computer, the system makes a request for allocation of memory. If the requested memory is not available, the system generates “Not Enough Memory to complete this operation” message on your computer. In addition to this, Not Enough Memory error in Windows 10 can also be caused by missing/corrupted or incompatible device drivers, hardware failure and other reasons.
1. Increase Virtual Memory
The most recommended fix for this error is to increase the Virtual Memory on your computer. This allows the computer to use Virtual memory (paging file), whenever RAM is not available.
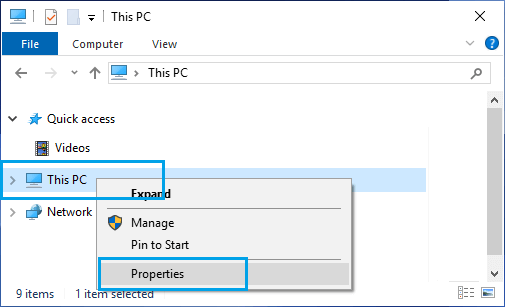
Open File Explorer > right-click on This PC and click on Properties.
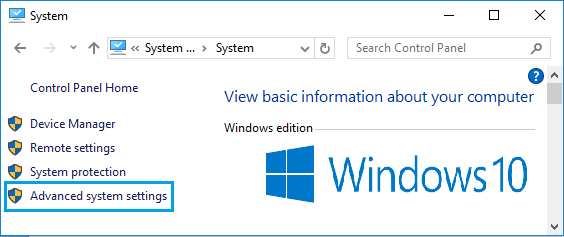
On the System screen, click on Advanced system settings link in the side menu.
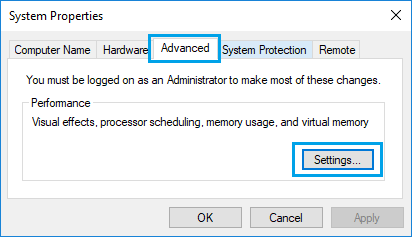
On the next screen, select Advanced tab and click on the Settings button under Performance section.
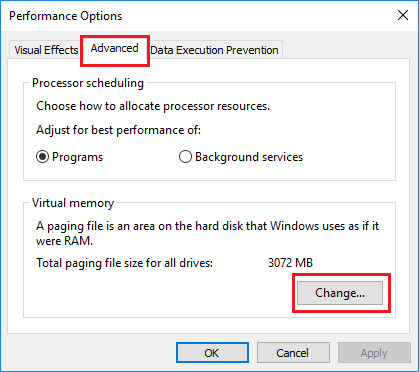
On Performance Options screen, select Advanced tab and click on the Change button under Virtual Memory section.
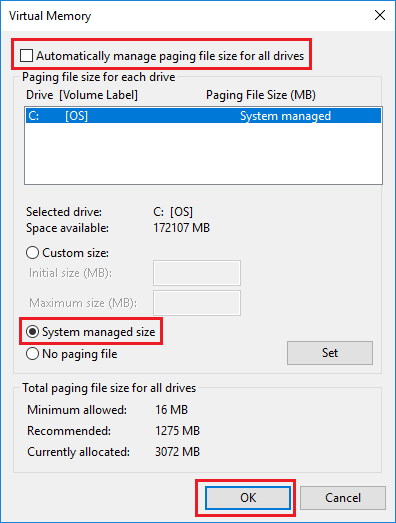
On Virtual Memory screen, uncheck Automatically manage option, select the Drive, select System Managed size and click on OK.
Make sure you Restart the computer for above changes to be implemented.
2. Update Windows
Make sure your computer is running the latest version of operating system and programs.
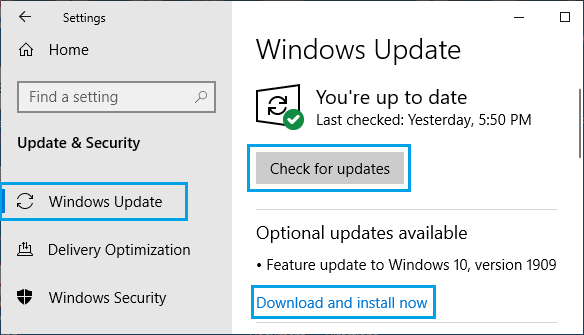
- Go to Settings > Update & Security.
- On the next screen, click on Download and Install now to install the available updates.
If Download option is not available, click on Check for Updates.
3. Update Device Drivers
Corrupted or incompatible device drivers can create high memory demand.
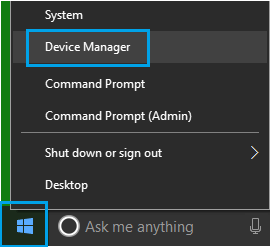
Right-click on the Start button and click on Device Manager.
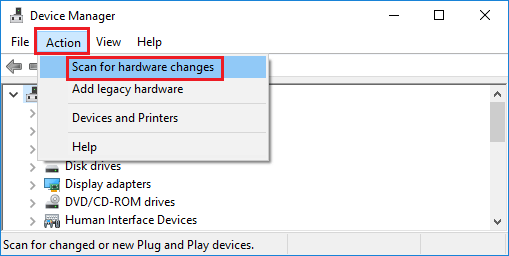
On the Device Manager Screen, click on Action > Scan for hardware changes.
Windows will scan your computer for Hardware changes and update device drivers (if required).
4. Run SFC Scan
If your computer is still coming up with Not Enough Memory Error, run SFC Scan Command to check the Hard Disk on your computer for errors.
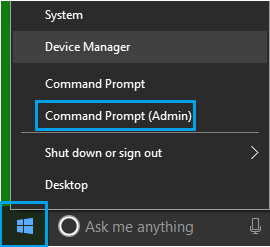
Right-click on Start button and click on Command Prompt (Admin).
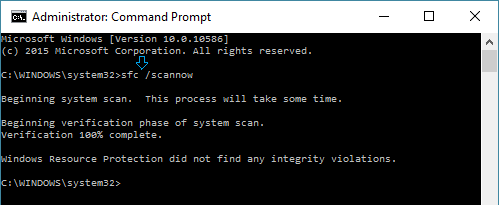
On Command prompt window, type sfc /scannow and press the Enter key on the keyboard of your computer.
Note: There needs to be a space between sfc and /scannow. 3. Restart your computer to see if the problem is fixed.
How to Disable Notifications in Windows 10 How to Optimize and Defragment Hard Drive in Windows 10

