Rename Printer in Windows 10
By default, the print dialog box in Windows 10 shows all the printers that you are currently connected to and also printers that were previously connected to your computer. This practically results in all your previous/current Home and Office Printers appearing in print dialog box, which sometimes makes it harder to select the printer that you actually want to print to. Also, the default tendency in Windows 10 is to name printers using Make and Model Number of the printer. This can lead to more confusion, if your computer is connected to two or more printers from the same manufacturer. Even if your computer is not connected to multiple printers, you may still want to Change the Name of your Printer to something that you can easily relate to.
1. Change Printer Name Using Settings
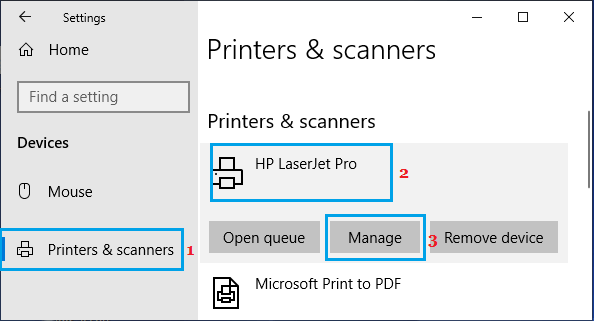
The easiest way to change Printer Name in Windows 10 is by using the Settings App. Go to Settings > Devices > select Printers & scanners in the left-pane. In the right-pane, select the Printer that you want to rename and click on the Manage button.
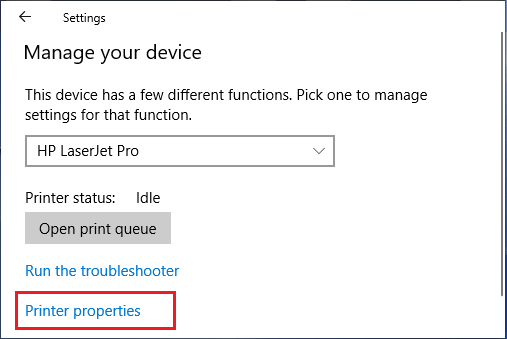
On the next screen, click on Printer Properties link.
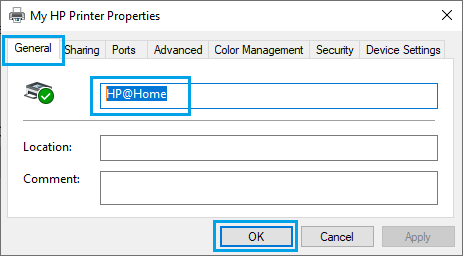
On Printer Properties screen, select the General tab > change Name of the printer and click on OK to save the New Name.
After this, you will this Printer appearing with its New Name in print dialog screen.
2. Change Printer Name Using Control Panel
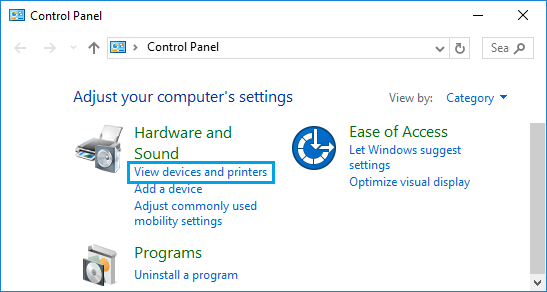
You can also change the Name of Printer in Windows 10 by using Control panel. Open Control Panel, switch to Category view and click on View Devices and Printers link under “Hardware and Sound” section.
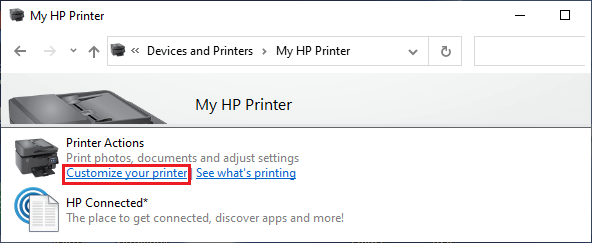
On Devices and Printers screen, double-click on the Printer that you want to Rename. On the next screen, click on Customize your printer link.
On Printer Properties screen, change the Name of your Printer and click on OK to save the New Name.
Now, you should find it easy to identify your printer from host pf other printers listed in print dialog box.
How to Change Default Printer in Windows 10 How to Add Printer Using IP Address in Windows 10
